0

Birthday/Memorial Weekend Sale

2015-05-12

Shop Sale

Greetings Everyone!

In celebration of my birthday and memorial day weekend Tailsandsnouts is having a sale. From now till May 26th take 25% off using the coupon code BIRTHDAY. This offer doesn’t apply to clubs, reserved, or custom orders.

Thanks and have a wonderful day,
Elizabeth 🙂

22

400 Sales Giveaway!

P1140413    To celebrate reaching 400 sales I’m having a giveaway for my brand new colorway “Cloud 9”. This fun new colorway repeats itself with a soft white before jumping to a bright shifting rainbow of blues, greens, yellows, pinks, and purples. Follow the instructions below for a chance to win this great new yarn. Plus a big thank you to all that have helped me reach this amazing milestone!  Have a great day and good luck 🙂

P1140545

a Rafflecopter giveaway

0

How To Dye Ombre Gradient Yarn

P1140079

Lately I’ve been seeing beautiful ombre yarn and decided to give it a shot. Personally I aim to find the easiest and most effective way when trying out a new technique. In the end I took bits from other techniques and adapted them till I liked the result.

You’ll need: yarn of choice, acid dyes, vinegar or some acid, gloves, and something to cook the dye in (I use an old crock pot)P1140084

First step: wind the yarn into a loose ball. It should be easily squished ball of yarn.

Second step: add your dye and water into the pot of your choice. Remember it has to be a strictly dye only pot. Make sure you add enough water so that the ball of yarn can be completely covered.

Third step: place the dry loose ball of yarn into the dye water with gloved hands. Continue to squeeze the yarn to absorb dye water until no bubbles emerge from the yarn. Put on the heat and let the yarn cook for a bit.

Forth step: when most of the dye has been absorbed turn off the heat and add your vinegar or acid. If it’s not to hot give the yarn some squeezes to absorb the vinegar. Otherwise let it cool for a bit. IMG_20141103_210515

Fifth step: once the yarn has cooled and the dye has been absorbed then you can rise and squeeze the water out of your yarn. Then you can turn it into a skein on a niddy noddy. It can be a bit tricky when it’s wet so I tend to let it dry a few days in the ball form.

Now you have your own ombre gradient yarn!

0

4 Year Anniversary Sale

cropped-etsybannernew2.jpg2014-05-143

I’m so excited to announce that my humble yarn and fiber shop has been up and running for 4 years now. It’s hard to believe how the time has passed. So as a way to thank everyone that has supported my shop and to celebrate 4 years Tails&Snouts will be having a big anniversary sale. The sale with run from August 16th to the 20th and will be for 30% off. To take part in this amazing deal use the coupon code ANNIVERSARY. Get your goodies while you can and an extra big thanks to all who have supported the shop! 

-Elizabeth of Tails&Snouts 🙂

*Coupon excludes clubs*

0

August Stitch Fix

IMG_20140802_103825
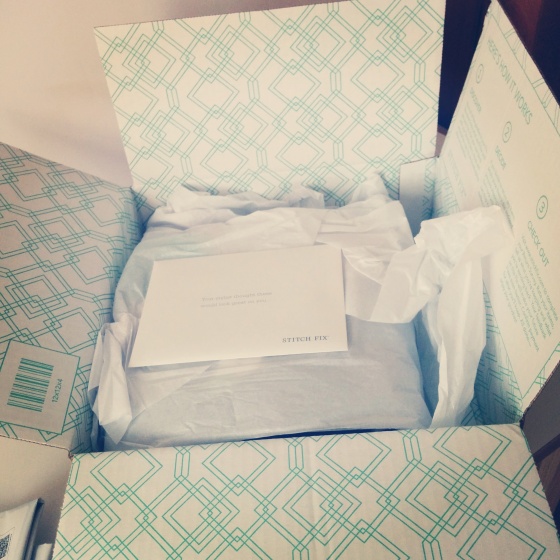
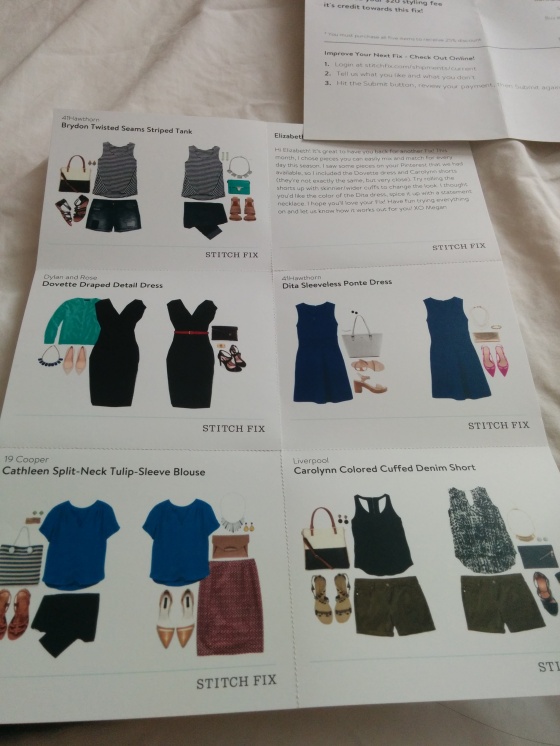
The latest Stitch Fix box has arrived! For this box I asked them to avoid jeans and to stick with colors more like jewel tones. As usual they delivered! So far I’ve been loving the convenience of Stitch Fix plus it’s been adding great new pieces to my wardrobe. For this box I ended up getting two dresses, two tops, and a pair of shorts with the whole box coming to $204 with the possible discount.   

IMG_20140802_121954
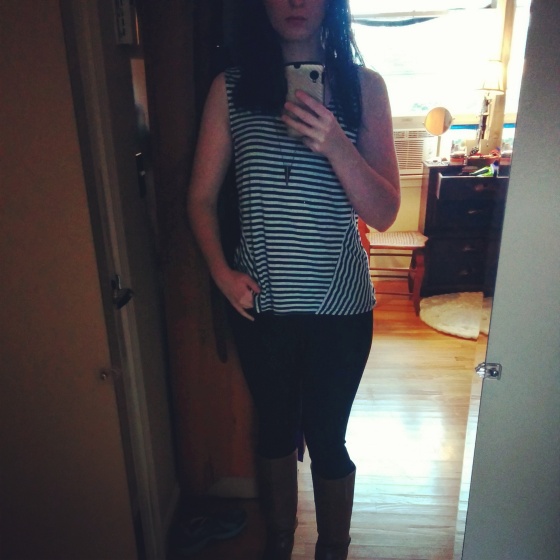
Wearing: Brydon Twisted Seams Striped Tank (Stitch Fix), Black Skinny Jeans (Previous Stitch Fix), Riding Boots (AE), and Shield Necklace (Laura Lombardi Jewelry).

The first top I tried on was the black and white Brydon Twisted Seams Striped Tank, which was $48 and from 41Hawthorn. I wanted to love this top so much, but the cut and stripe placement made me look rather flat chested. So this one wasn’t a keeper. 😦IMG_20140802_122202Wearing: Cathleen Split-Neck Tulip-Sleeve Blouse (Stitch Fix), Black Skinny Jeans (Previous Stitch Fix), Riding Boots (AE), and Shield Necklace (Laura Lombardi Jewelry).                              

The second shirt was a cobalt blue Cathleen Split-Neck Tulip-Sleeve Blouse from 19 Cooper costing $68. This shirt sadly turned out to be a dud. As much as I love blue this shirt was way too bright for my taste and the sleeves puffed up whenever I moved my arms. Which in turn caused my already wide shoulders to look wider. So this top was sent back. 

IMG_20140802_122534
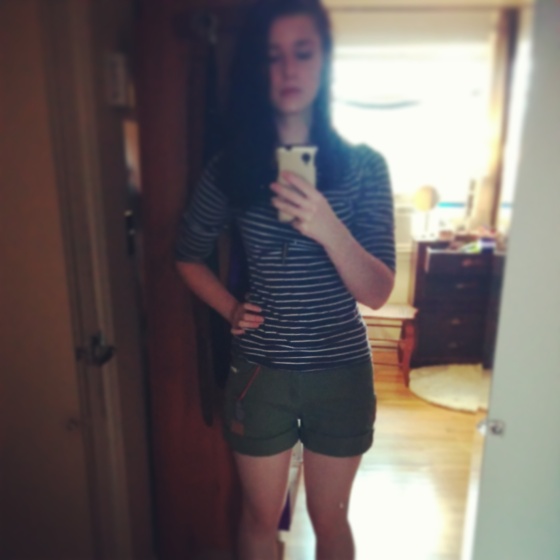
Wearing: Striped Gray and White top (H&M), Carolynn Colored Cuffed Denim Shorts ( Stitch Fix),  and Shield Necklace (Laura Lombardi Jewelry).  

The Olive green Carolynn Colored Cuffed Denim shorts costing $44 from Liverpool I wanted to love so bad. They were my favorite color and I had even pinned them on Pinterest. Alas the bottom curse appeared! They fit just right in the thigh and booty, but the moment they got to my waist I was swimming in them. The gap between my waist and the shorts was easily 4 inches so these couldn’t stay.        
IMG_20140802_123028
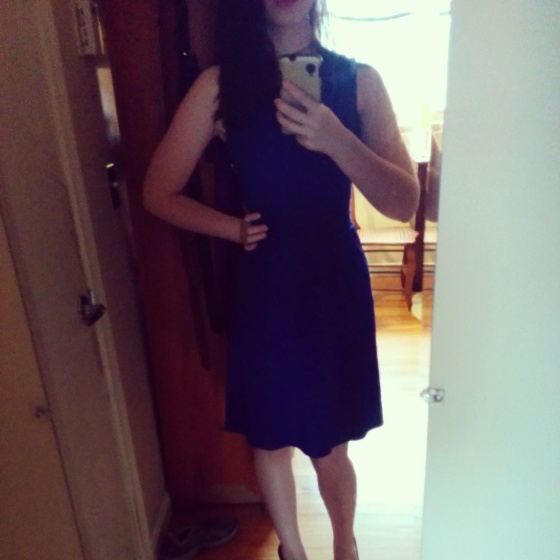
Wearing: Dita Sleeveless Ponte Dress (Stitch Fix)

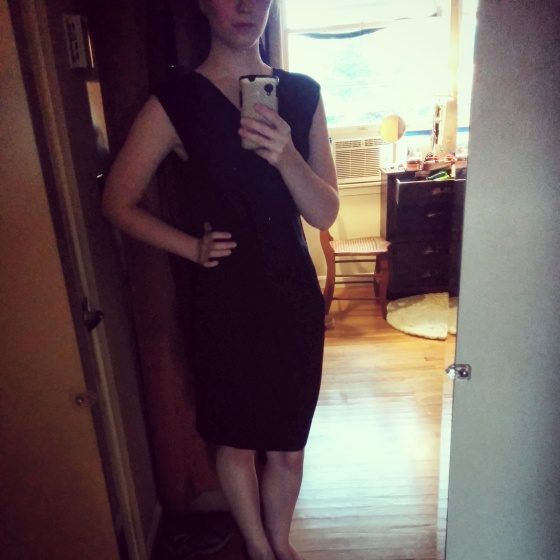
Now this dress was the first real winner! A light navy Dita Sleeveless Ponte Dress from 41Hawthorn costing $68 that was made for me. Hugged in all the right places and was modest enough to wear for work or a nice night out. This dress hit me just above the knees and could be played up or down depending on the shoes. This was an instant keeper!  

IMG_20140802_124024Wearing: Dovette Draped Detail Dress (Stitch Fix)

Every girl that likes dresses needs a little black dress and this Dovette Draped Detail Dress from Dylan and Rose for $64 was mine. This dress felt silky smooth and had some fun draping details. It made me look a bit extra hippy, but the wide sleeves helped balance it out a bit. So in the end this was a keeper as well. 

IMG_20140807_084207In the end I purchased both the dresses, which ended up costing me $112. Overall this was another great Stitch Fix experience and I look forward to my next box of goodies. If you’d like to try Stitch Fix out then here’s my referral link. 

0

Stitch Fix Again

Take two of enjoying my Stitch Fix box! I decided to do the automatic box every month so my next goodie will be in August. That is unless I’m tempted to get another earlier. So for this box I asked for some nice low key dresses for a relaxed wedding coming up. They delivered on my dress request and beyond. I honestly had a difficult time deciding on what to keep and what to send back. Everything ends up fitting me surprisingly well, which makes the decision extra difficult. In the end it came down to what was most my style and if I already had something similar to it. If you want to give Stitch Fix a try feel free to use my referral link.

 The first item I tried on was the Malia Chevron Border Tunic from 19 Cooper. I also decided to pair it with the Porter Basic Leggings from Rune. Both items felt like they fit well and the leggings were so wonderfully comfortable. I however decided not to get either of them due to not being a big tunic fan. Plus I tend to only wear leggings in the house so it would seem a bit silly to get something that I’d only wear inside.

 The first of the dresses I tried on was the real star of the box. It was a lovely seafoam mint Callafia Short-Sleeve Wrap Dress from 41Hawthorn. Actually kept a shirt from them in my last box. Having a wrap dress was new to me so that was an interesting plus. It was also perfect for the low key wedding. The dress fit so well in just the right ways and would be great dressed down or up. This ended up being the keeper for this box.

 The second dress was this fun Francis Striped Fit&Flare Dress from Pomelo. The dress had some great shaping to it, but I already had a dress very similar to it already in my closet. I really liked the stripes on the bottom of the dress even if it put more emphasis on my hips, which can speak loud and clear by themselves. The top portion of the dress was lovely, but thanks to my wide shoulders it created a weird gap between my chest and arms.

The last item was a nice Henry Birds On Branch Infinity Scarf from Octavia. The scarf was nice and big, which I like in scarfs. I however can be rather particular when it comes to accessories. Nor is the weather accepting of scarfs at the moment.


1

Lazy Girls Gnocchi

Lately I’ve been having major gnocchi cravings, but I always find rolling the gnocchi a pain. I even have a pasta maker and was desperately hoping for a gnocchi. No such luck for me. Then I happened to come across a cleaver trick on Food and Wine, which I decided to give a shot. First time I used to suggested bakers twine with some sweet potato gnocchi dough. Either the baking twine was too thick, the dough was too moist, or I simple couldn’t get the angle down the gnocchi came out “fun shaped.” That didn’t discourage my attempt at being able to make gnocchi without rolling. So the second time I tried out my lazy gnocchi recipe and tried the same technique, but with unflavored dental floss. While it was far more effective the steam caused the dental floss to lose its tension. So far the most effective method has been using fishing line of all things.

 The next key factor for me was finding an easy recipe to use and a resourceful thought popped into my head, “there’s leftover mashed potatoes in the fridge maybe that will make good gnocchi.” With that thought I managed to create easy delicious gnocchi from leftovers.

  Lazy Girls Gnocchi Recipe 
Serves about 2
2 egg yolks
1 cup flour (may need a little more depending on mashed potato moisture)
13oz leftover mashed potatoes (I used Simply Potatoes garlic mash)
  1. Place mashed potatoes in mixing bowl, slightly heat up if stiff.
  2. Then add egg yolks and flour. Gently mix and add extra flour till dough is no longer sticky to the touch. Then place in gallon or pastry bag.
  3. String your fishing line (twine or dental floss) across the handles of your shallow pasta pot and secure. Place water in a few inches below string. Bring water to boil.
  4. Once the water is boiling bring down to medium heat. Cut a hole in the tip of your bag.
  5. Place the bag perpendicular and to the side of the string. Start pushing the dough out and cutting at the desired length on the string. Don’t over crowd the pot. CATION: Be careful of the steam and any hot water that may splatter as the gnocchi drop.
  6. Wait for the gnocchi to rise to the surface then pull out with a slotted spoon. Repeat steps 5 and 6 till all dough is gone.
  7. Lastly top with gnocchi with something yummy.

Topping wise for my gnocchi I like to toss them in a pan to get them a little crispy then add my favorite tomato sauce, spices, and cheese on them.

0

Giving Stitch Fix a Try

When it comes to shopping my internal feelings tend to butt heads. Getting new clothes gives me the same warm fuzzy feeling that yarn or fiber gives me, however I hate the actual act of clothes shopping. Endlessly looking through racks hoping you’ll find something you like and even if you do there’s no guarantee that they’ll even have your size. Plus over crowded shopping areas drive me up a wall like nothing else. My love-hate relationship to shopping ended up pushing me to give Stitch Fix a try.

The general idea of Stitch Fix is to have someone else do the styling and shopping for you. Plus the only work you have to do is decide on what to keep. When you first create an account with Stitch Fix you create a style profile so to speak. It’ll ask for your usual size, what you want to flaunt or hide, what style palate speaks to you the most, and how much you’d like to pay for each item. All you have left to do is schedule when you’d like your Stitch Fix to arrive. Once your box arrives you can try everything on in the comfort of your home and anything you don’t like just send it back in the prepaid envelope. What you keep is what you pay for plus an initial styling fee, which is applied as credit to anything you purchase from that box. What I find really nifty is that they send along a little styling sheet on what to pair with everything in the box.

For my first box I received an orange and pink striped maxi dress, while I loved the fit of it I just couldn’t get into the colors.

The second item was an off white clutch, which again was lovely I however avoid white clothing and accessories due to how easy it is to get them dirty.

 From the box I got two tops one being a minty turquoise dolman printed top and the other being a dark navy tab sleeved blouse with white tulips on it. The dolman again fit me wonderfully, but the pattern didn’t fit me or my styling. The tulip top however was possibly my favorite item out of the box. A little low with the v neck for my personal taste other than that it was comfy and versatile.

 Lastly I received a pair of black skinny jeans, which are amazingly comfy and a little miracle fit wise. Like 

most people finding pants that fit well is a challenge. For myself I have a hard time finding bottoms that fit my curvy hips and the drastic change to my small waist. Thankfully theses pants have fit the best in that area. The pants were a little long, but looked cute cuffed and most of the time hidden in riding boots.

Everything that was picked out fit me great, if not perfectly. Anything that I decided to send back came down to color or style. That’s to be expected with your first box, but the more boxes you get the better your stylist will be at picking out items you like. In the end I decided to keep the navy tulip top and the black skinny jeans. When everything was decided upon I simply checked out on the Stitch Fix website on what I was or wasn’t keeping and why to better help the stylist for future boxes. Overall this was a wonderfully exciting and fun experience. Sure there weren’t things that spoke to my style soul, but it was nice to try a few items on in the comfort of my own home without having to put in all the shopping effort.


5

Beehive Honeycomb Knit Boot Cuff Pattern

Beehive Boot Cuff Pattern

  • Bulky yarn about 100 yards and up depending on size

  • 4 Double pointed US size 10 1/2 needles

  • scissors

  • tapestry needles

CO 38 (44, 50, 56, 62…etc depending on desired size) divide evenly and join in round

Round 1-4: *(K1, P1) Repeat

Round 5: K all, add 4 stitches evenly throughout by kfb

Round 6: P all

Round 7-12: *(K4, slip 2) Repeat

Round 13: K all

Round 14: P all

Round 15-20: K1 *(slip 2, K4) Repeat. End round 20 with K3.

Round 21: K all

Round 22: P all

Repeat from Rounds 7-22 till desired length. End on either round 12 or 20.

Round 23: K all

Round 24: P all

Round 25: K all, decrease 4 stitches evenly through by k2tog

Round 26-28: *(K1, P1) Repeat

BO in *(K1, P1) fashion

Weave in ends and enjoy! 🙂

Notes: Following these instructions 38 stitches fits up to 13 inches around.